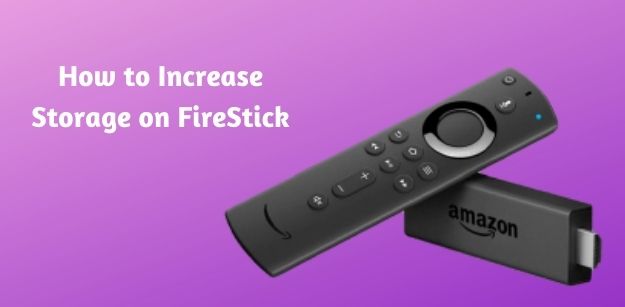
One of the common complaints’ owners of the Amazon Firestick have is the lack of space for their apps. Usually, the FireStick comes with 8GB of internal storage. When all applications are installed, there is typically no space left.
Finding more space on the FireStick is a complex but doable process. Please note that the process doesn’t work on the older versions of the FireStick, but it works well on FireStick 4K, Fire TV Stick, the Lite, 2nd Gen, and 3rd Gen versions.
Some of the problems of low internal storage are low optimization applications and storage, or the apps in use freezes or the screen even go blank. With newer versions of applications popping up every day, the sizes increase as these new versions arrive.
Items Needed to Increase FireStick’s Storage
This process takes about five minutes, but you have to be careful and understand it before performing it on your device, so you don’t damage it. Now that we are clear let’s get started.
The first thing required is the thumb drive. It is going to act as the internal storage for the FireStick. Another thing required is a USB OTG. The reason for the OTG is that the FireStick itself doesn’t have a USB port. The most important you need is the FireStick and a Remote ADB Shell App.
For this upgrade, we’ll be using Fire TV Stick 4K, xStream USB Port Adapter, and a USB 3.0 Flash Drive (the one used has 64GB storage, don’t go lower than that).
Step One: Connect the Thumb Drive to FireStick Via the USB OTG
The first to do is connect the thumb drive to the Port of the OTG and connect the other end to the Firestick. The Firestick and the thumb drive hook to the Firestick to the power adapter, turn on the TV.
Step Two: Enable Various Settings
The TV shows the Home Screen, then scroll to Settings. If your TV model doesn’t go straight to the home screen, click on the home button on your remote, then click on Settings. From the options in Settings, scroll to, and click My Fire TV. Among the options that drop, look for, and click on Developer Options. Move to Apps from Unknown Source, and hover on the option. Click on Select when the option shows.
When you click on Select, you are asked to confirm your action. To enable your action, shift the toggle to Turn On. The next step is to move to the ADB Debugging, click on Select, and tap the toggle ON to enable.
Step Three: Type in Your IP Address
With those options done, go back to the My Fire TV option, and scroll, and click on the About option. From the resulting options, scroll down and click on the Network option. Write out your IP Address on the space that appears on the right side of your screen.
When that is done, it completes the first part of the enlargement process. Are you following so far? Please go over the steps carefully before, before commencing.
Step Four: Install Remote ADB App
The first step in the second part is downloading and installing the Remote ADB app.
Remember enabling apps from unknown sources? This is because the application is not on the App Store, so we have to download it from a third-party source. To do this, return to the Home Screen, then click on Search.
The Search icon is usually located at the top of the TV screen. Type Downloader into the search bar and click Search. When the results arrive, click on the first one. From the various apps shows on the next page, click on the app with the orange background.
The app is free, so all you need to do is to click on the Get button. Downloading and installation might take a while, so you have to be patient. When the installation is complete, open the app to launch it.
The first time the downloader launches, it asks for permission to access your media, photographs, and files. Click on the Allow button. After that is out of the way, the application offers a quick tour for new users to get acquainted with the app.
Click on the Got it to option to get right into the business. From the home screen of the app, go to the small box and click on Select. Then type in https://firesticklab.com/rmadb.apk, and click Go. When the app downloads, an Install icon appears.
Click on it to install the app, then open it after it’s done. As soon as you launch the app, you will receive a notification showing New Pair Key Generated. Click OK, then leave the boxes that appear and click Next.
A box with IP address and Port appears. Confirm if the IP address is correct the click Connect. After that, you are to enable, Allow USB Debugging, Allow Trust This Computer. When this is done, click OK. The next thing that appears is a command prompt, click on the Select option and type, sm list-disks, then click Run.
Step Five: Configure Your Storage
The name of the thumb drive is attached to the FireStick. From here on, you have to pick between two options. sm partition disk: 8,0 private, it turns the thumb drive into the FireStick’s internal storage, meaning it can’t be used for anything else.
While sm partition disk: 8,0 mixed 50, this option allows you partition into two parts. One acts as internal storage. The other acts as external storage, so you can use it outside the FireStick. This option is preferable because you can transfer files between devices.
Whichever option you pick; you will get an Unexpected Removal response. Don’t fret. Just be patient for a while. After some time has elapsed, the thumb drive connects, and you will be notified. Your FireStick’s storage has been increased from 8GB to at least 32GB.
Conclusion
The process might seem complicated, but it is simple. All that needs to be done is to follow the steps carefully and make sure the devices are correctly connected.
About The Author
Stephanie Braga
Hi, I am Stephanie Braga. A professional blogger and content community manager on this platform. I love to write and post content on different niche. Contact me, if you need any help related to digital marketing or content marketing.


